參考資料
props型別介紹
我們知道Props是將外部資料傳入元件內,但你怎麼知道傳入的東西是否符合需求或安全呢?而這時就需要使用到型別驗證。而常見的型別如下:
參考資料:官網類型檢查
1 | String |
提醒:型別字首要大寫 如:
type: Number
範例:
完整內容請看codepen
1 | props: { |
提醒:因為props是在
元件實體建立前進行驗證,所以實體內屬性(如data、computed等)在default或validator函數中是不可用的。(待補充)
若型別錯誤,會出現下面畫面
注意:檢查型別驗證是否錯誤,只有開發版本(development)上才會出現,production版本不會出現

這邊特別注意:
1.驗證object時,default必須為一個function 如下
1 | propE: { |
2.這兩種寫法相同喔!都是對型別不做任何驗證
1 | props:['parentMsg'] |
小結論
型別驗證有助於我們在開發時候,提前了解哪邊資料錯誤。但實際上,即使資料傳入資料型別錯誤,畫面依舊會將傳入資料顯示在畫面上喔!
單向資料流
說明:
我們知道,Vue在傳遞資料時,是透過Props將資料由外部往內傳遞,而且所有的 props 都使得其父子 props 之間形成了一個單向下行綁定:父級prop 的更新會向下流動到子組件中,但是反過來則不行。
後記:仔細想想也蠻有道理,假設我們可以從子層更動父層實體內容,如此一來父層實體內容便會無法管理(或是說資料會不知道被誰更動過!)
錯誤範例示範
連結
HTML部分
1 | <div id="app"> |
JavaScript部分
1 | Vue.component('my-component', { |
圖示
如果我們要修正錯誤,該如何解決呢?
- 只要新宣告一個參數來接受外部修改資料就好~寫法如下
- 或是在元件中使用computed
get、set - 這兩種寫法目的:都是讓資料獨立存在於子層而非父層
1
2
3
4
5
6
7
8
9Vue.component('photo', {
props: ['imgUrl'],
template: '#photo',
data: function () {
return {
newUrl: this.imgUrl
}
}
})當V-model遇到props
codepen示範
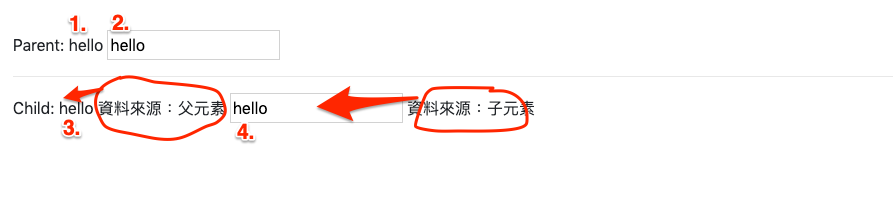
範例如下: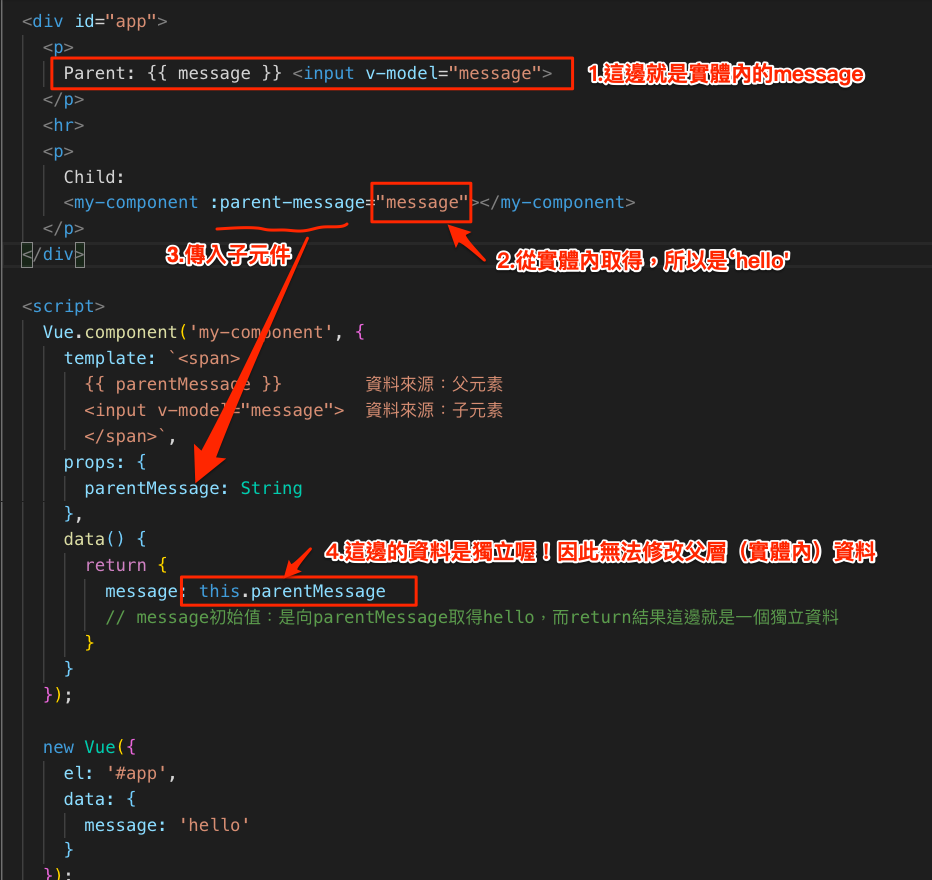
透過上方圖片講解,重點在於第四點,在component底下的data資料是無法改變上層父元素內容!也就是下方圖片中更改4號是無法更改1、2、3的資料