參考資料
元件溝通方式
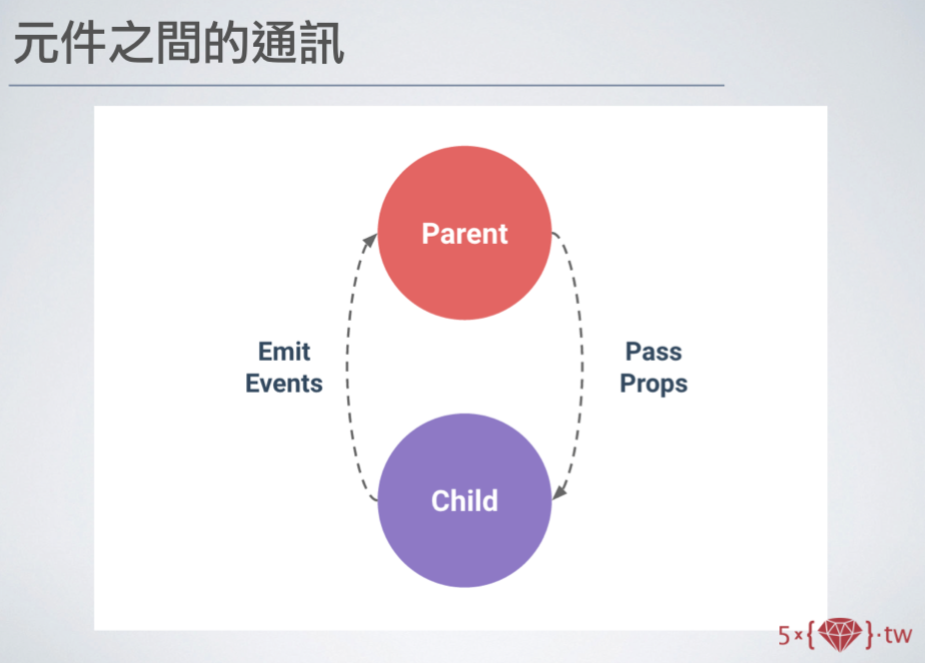
元件與元件之間的溝通方式主要有下面幾種
1.props in, emit out
2.event bus
3.$parent、$children
4.Vuex
我們今天主要會專注在props、emit這一種最常用的方式做介紹,而其餘內容將在日後慢慢介紹。
props介紹與使用
- 用途:父層元件若要將內容傳遞進去子層元件就需要用到
props這個屬性。 - 寫法:
v-bind:props-in="msg",其中,props-in是自定義屬性、msg則會去實體內尋找
命名注意:HTML 屬性需要使用 kebab-case ,全小寫並使用分隔符號( - )來設定
如:props-in參考資料 - 為何需要props屬性?
還記得,我們昨天有提到元件內的data必須是function型式,確保每個子元件資料的獨立性嗎?正因為這樣,我們也不能透過父元件直接修改子元件內容,因此父元件才需要用到props這個屬性,來將外層資料傳遞進去子元件中。
範例:練習連結
HTML部分
1 | <div id="app"> |
JavaScript部分
1 | //x-template |
JavaScript部分
1 | //global register |
圖解: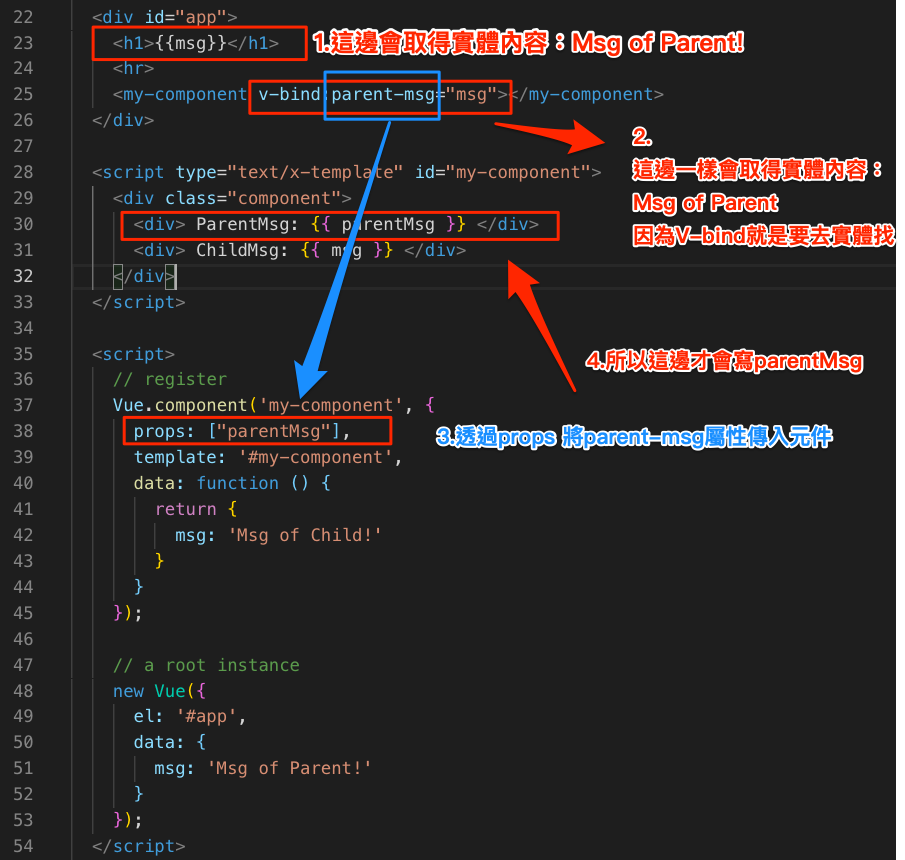
畫面如下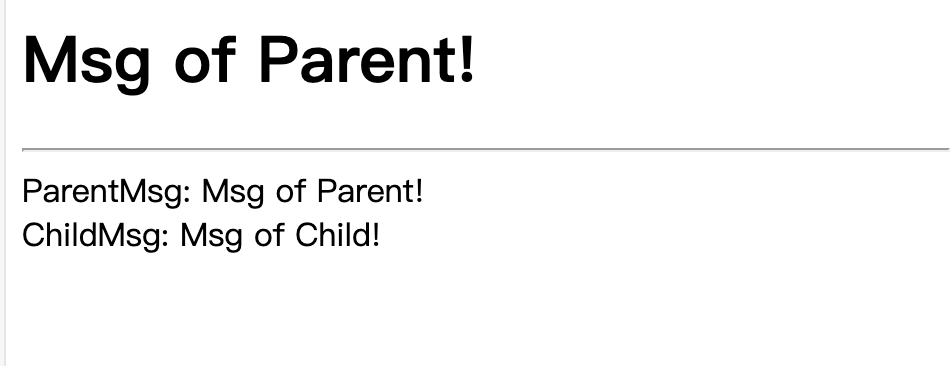
利用props傳入靜態屬性、動態屬性
- 靜態傳入寫法:不需要加入v-bind
寫法:props-in="靜態傳入",會傳入純文字 (註:props-in是自定義名稱) - 動態傳入寫法:需要加入 v-bind
寫法:v-bind:props-in="動態傳入"或是:props-in="動態傳入"(註:冒號不能省略)
範例: 練習連結圖片如下:1
2
3
4
5
6
7
8
9
10<div id="app">
<hr>
<my-component parent-msg="靜態傳入"></my-component>
<my-component :parent-msg="msg"></my-component>
</div>
<script type="text/x-template" id="my-component">
<div class="component">
</script>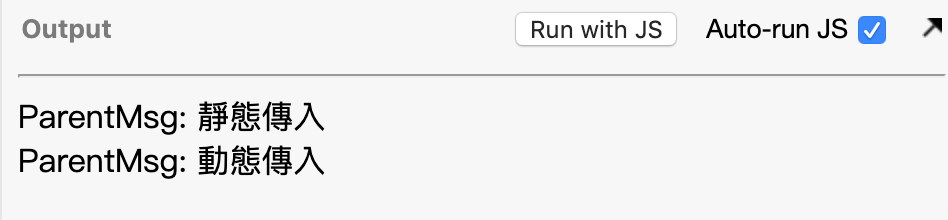
emit介紹
- 目的:當我們今天子元件內容要將資料傳遞到父元件時,就需要使用
emit這個屬性。 - 備註:會需要使用emit來觸發外層事件,其實是
props單向資料流關係,關於這個特性,會在明天介紹props使用注意上再來介紹喔!
範例:練習連結
HTML部分
1 | <div id="app"> |
說明:我們在my-component上,自定義一個update事件,當子元件update事件觸發時,則會同時觸發父元件selfUpdate事件
JavaScript部分
1 | Vue.component('my-component', { |
圖解說明: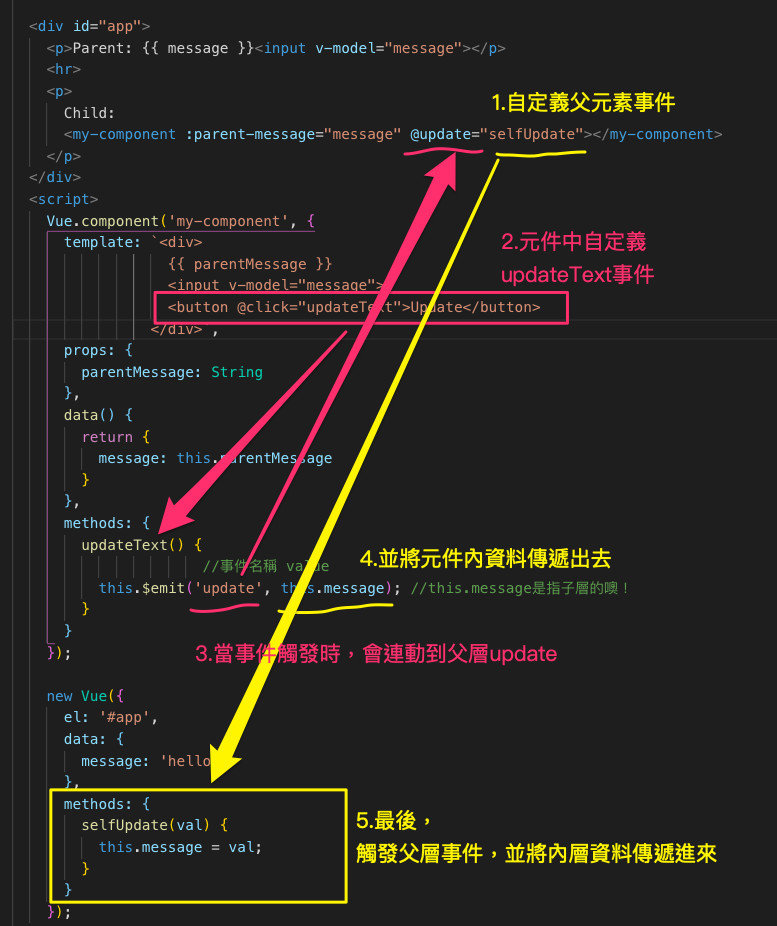
結論
這就是我們常講的props in, emit out的由來