參考資料:
- 六角學院Vue.js課程資料
- vue-router的兩種模式的區別
- 官方文件
Vue Router簡介
Vue Router就是由前端模擬的路由,跟過去不同的是,換頁通常會由後端處理。而Vue Router存在就是為了實現SPA(單頁式應用),當我們切換畫面時候就不需要向後端發出請求。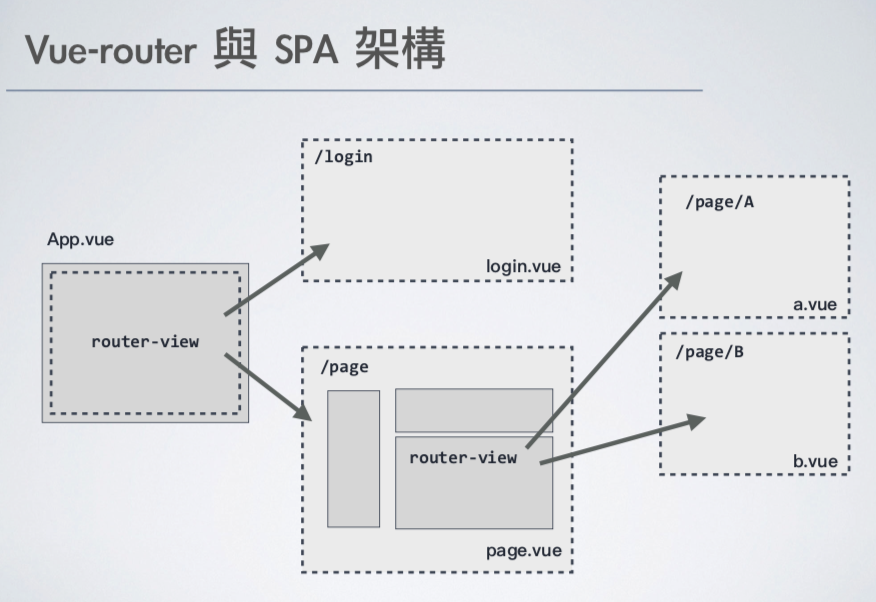
安裝方式
一、方法一
1.npm install vue-router
不用寫成這樣npm install vue-router --save
因為,Npm5.0.0版本後,安裝的套件會預設自動加入dependency
連結說明
2.接著在終端機中輸入 npm run serve
補充:使用npm run dev,會出錯因為package.json沒有這行指令
vue开发—-npm run dev 报错:missing script:dev
原因:npm run dev是Vue CLI2指令npm run serve則是Vue CLI3指令
兩者不可以混用喔!
3.接著要在router.js啟用Vue.use(VueRouter)
二、方法二
創建新的檔案時( vue create project),就直接勾選Vue router,Vue就會幫我們直接新增router.js
以上兩種方式,都可以安裝Vue Router
路由配置介紹
組件名詞介紹
<router-view></router-view> 呈現路由配置元件<router-link></router-link> 路由路徑main.js 進路點
Vue Components(如:app.vue檔) 分頁內容
路由配置教學
配置路由會在router.js、main.js、app.vue這三個檔案設定
- router.js
主要負責處理路由檔案配置管理。
補充:
1.@是絕對路徑,src 目錄的縮寫
2.export default 是 ES6 的模組匯出概念
- main.js
Webpack進入點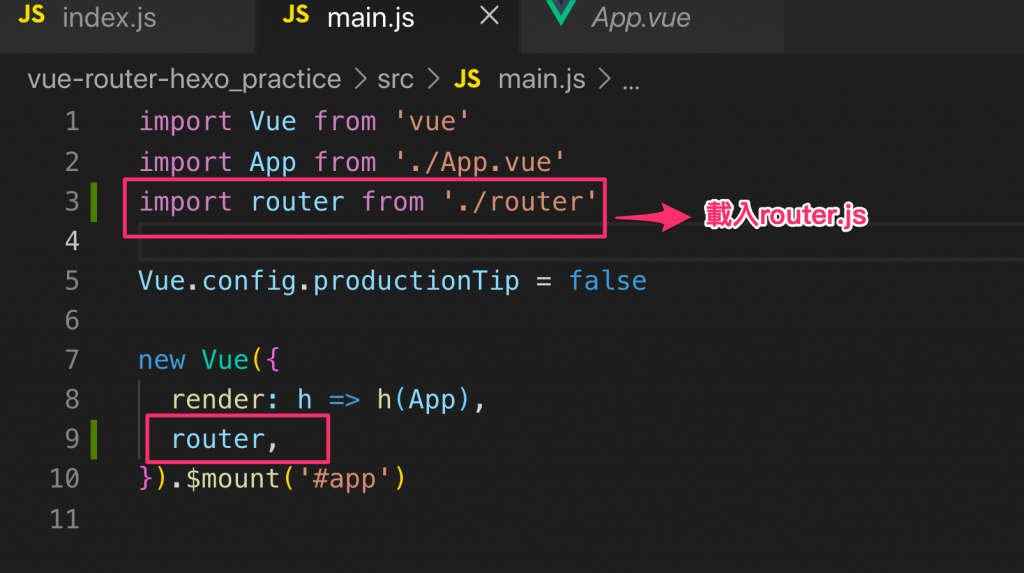
- app.vue
在這被拿來當作首頁使用,若有其他預設首頁可以自行更換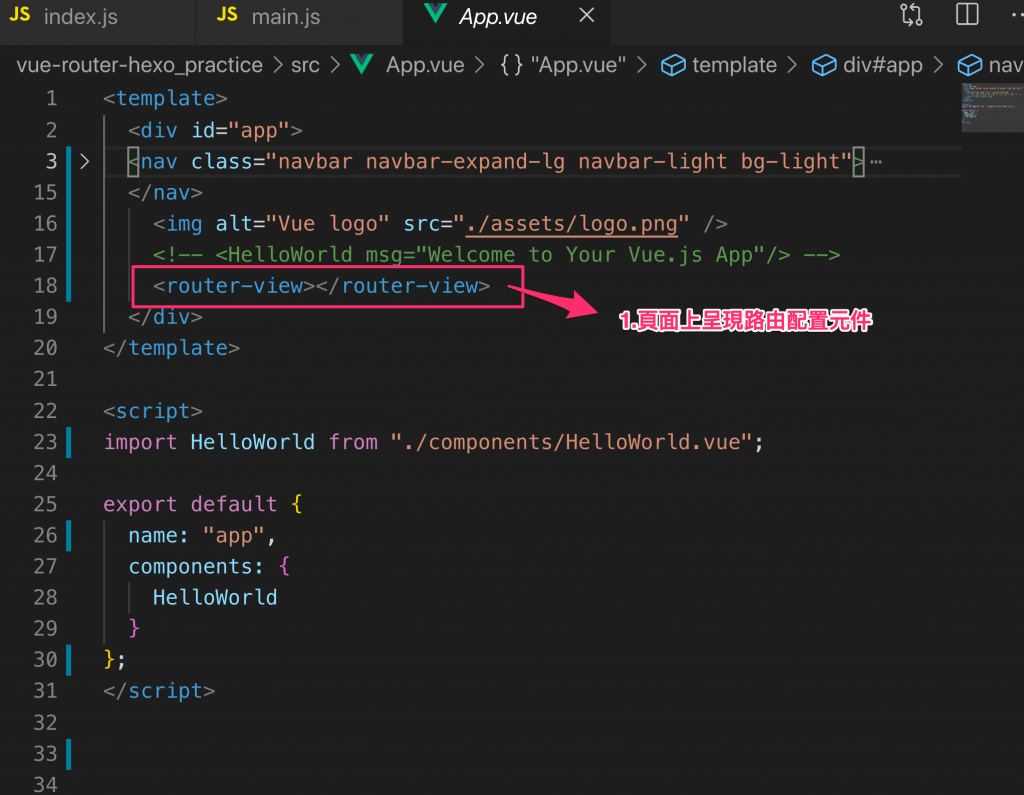
補充:首頁路徑問題
1.我們可以把‘/‘路徑視為預設載入首頁
2.假設今天,我們沒有‘/‘也沒有redirect指令如下,這時候載入畫面就會是空白的喔!這原理就如同建立網頁沒有設 index.html(首頁) 即使輸入網址,網頁也是顯示錯誤
1 | export default new Router({ |
小結論:
預設首頁要使用‘/‘或redirect指令,不然網頁會空白
巢狀路由
寫法其實跟一般路由配置相同,差異點僅在於巢狀路由會新增一個children配置底下分頁路由,以下就由我簡單示範一下。
- Page.vue檔案:
說明:我們會在要配置路由主頁,新增路由配置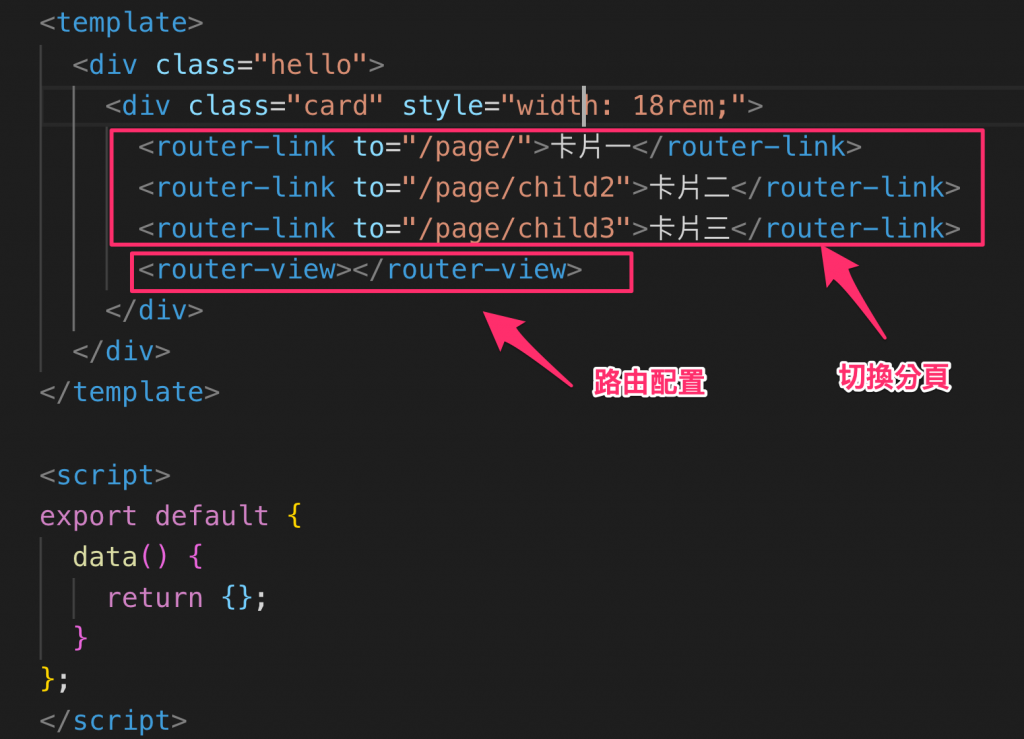
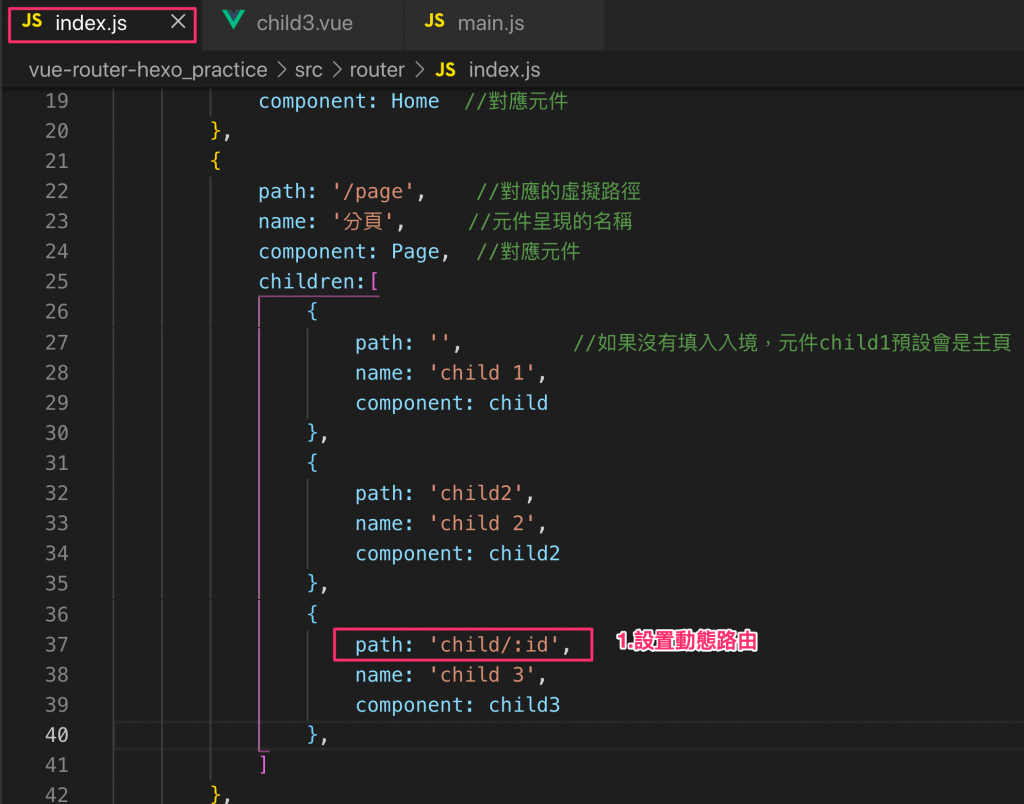
- Router.js檔案:
說明:所有路由檔案路徑配置都是在router.js檔案下,新增巢狀僅是在特定頁面下新增children:[ { } ]而已1
2
3
4
5
6
7
8
9
10
11
12
13
14
15
16{
path:'/page',//對應的虛擬路徑
name:'分頁',//元件呈現的名稱
component:Page,//對應元件
children:[
{
path:'',//如果沒有填入入境,元件child1預設會是主頁
name:'child1',
component:child
},
{
path:'child2',
name:'child2',
component:child2
]
},動態路由
前置作業:
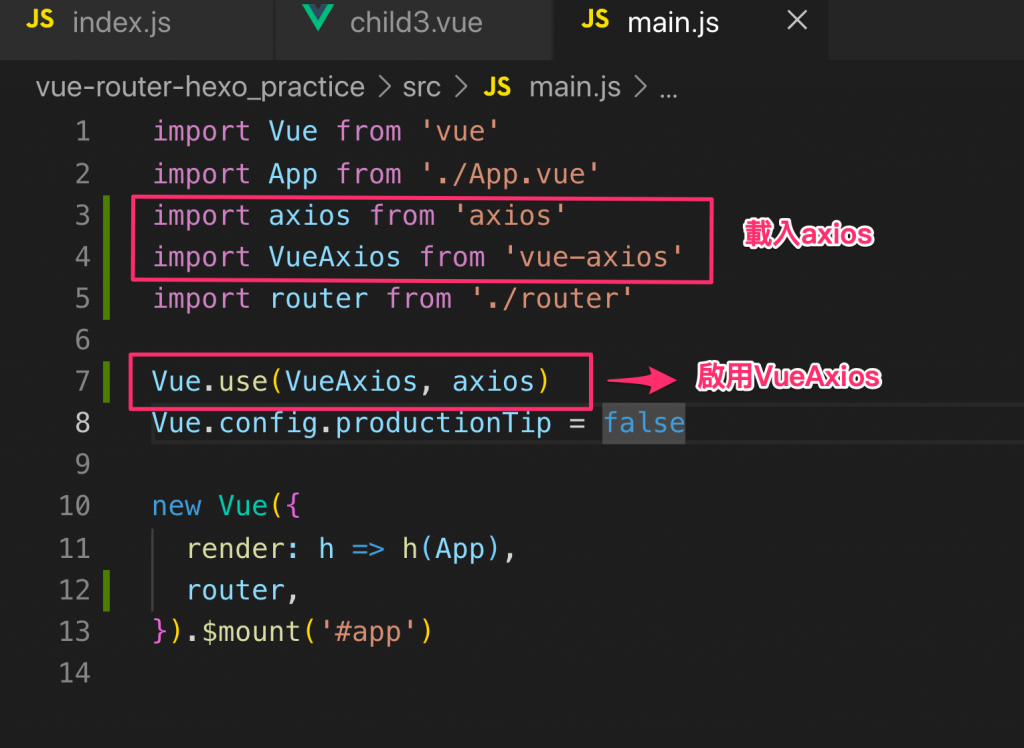
1.安裝 Vue-axios NPM安裝連結
2.安裝 random Api 連結
使用目的:
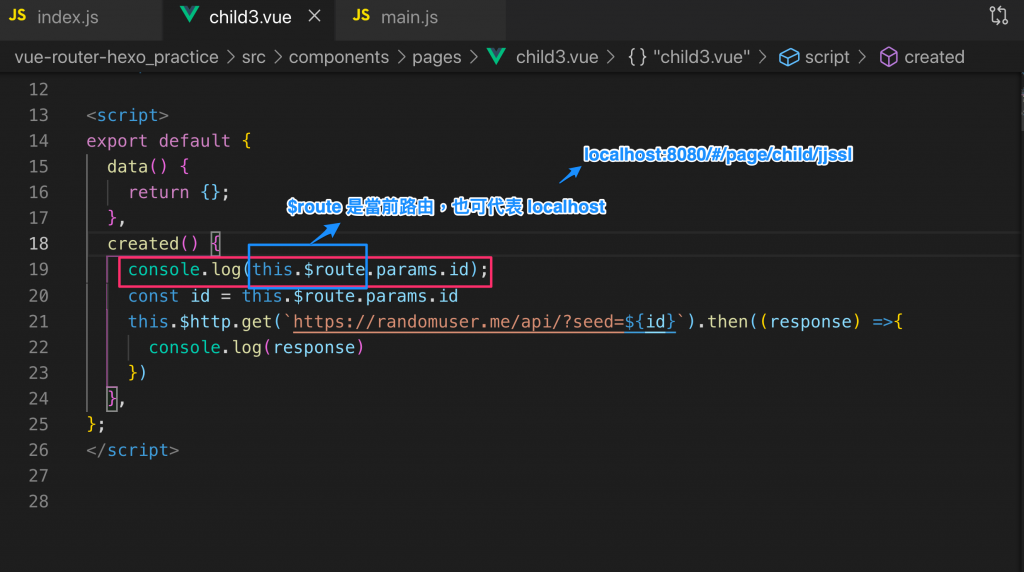
切換不同id時候,置換對應內容。開發時候會由後端提供定義好的id,前端在拿來套用切換即可。應用在後端權限控制上 參考文章
參考文件:路由對象屬性介紹
寫法拆解如下:
- Router.js檔案
- 分頁:child3.vue
- Main.js
同一個頁面載入不同元件
補充:router-view
「我們可以透過 vue-router 的設定檔來定義整體網站的路由規則,利用 router-view 來定位子路由組件渲染的出口,並可允許訂定多組具名 router-view 來一次顯示多個子組件於單一子路由中。」
白話文:父組件中會包含 router-view作為子組件的渲染出口!
- index.js
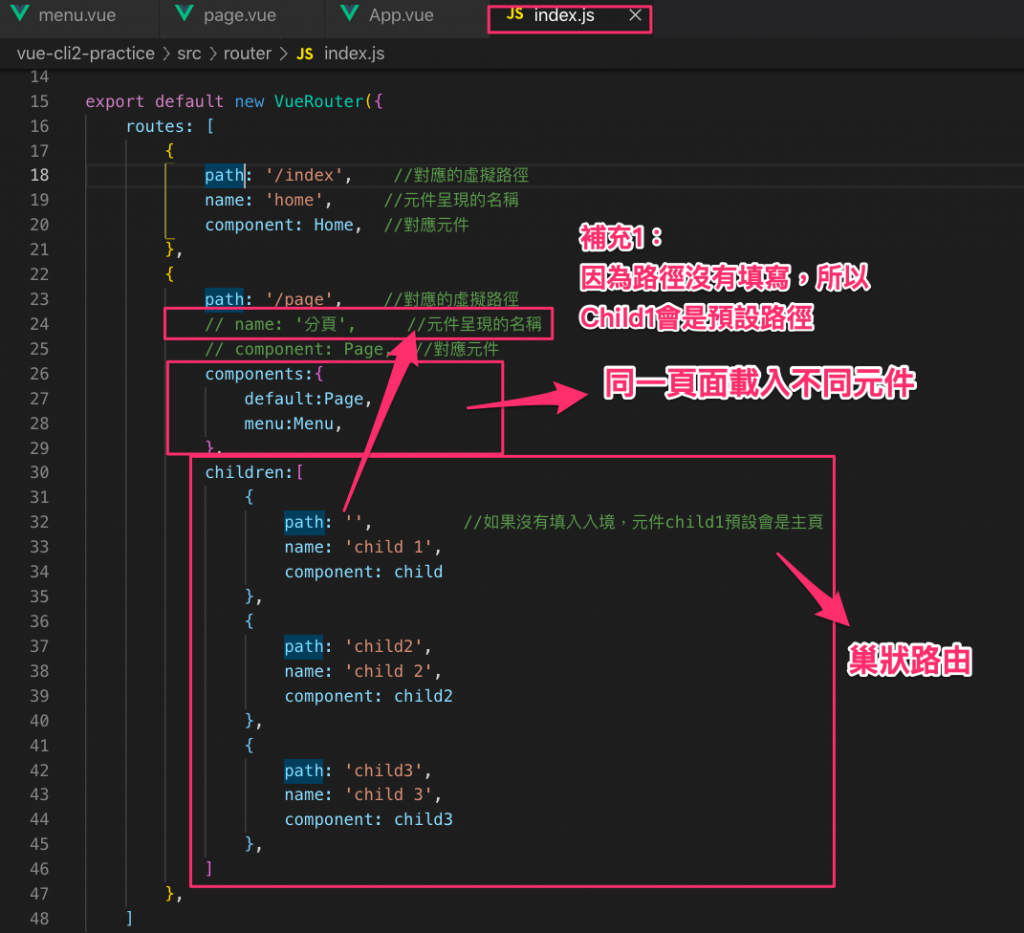
說明:補充1,因為child1如果不填寫入徑,會預設上層項目。故,我們要將
上層”name”隱藏 - App.vue
這邊可以視為首頁,換句話說就是整個 vue 包在最外層的父元件
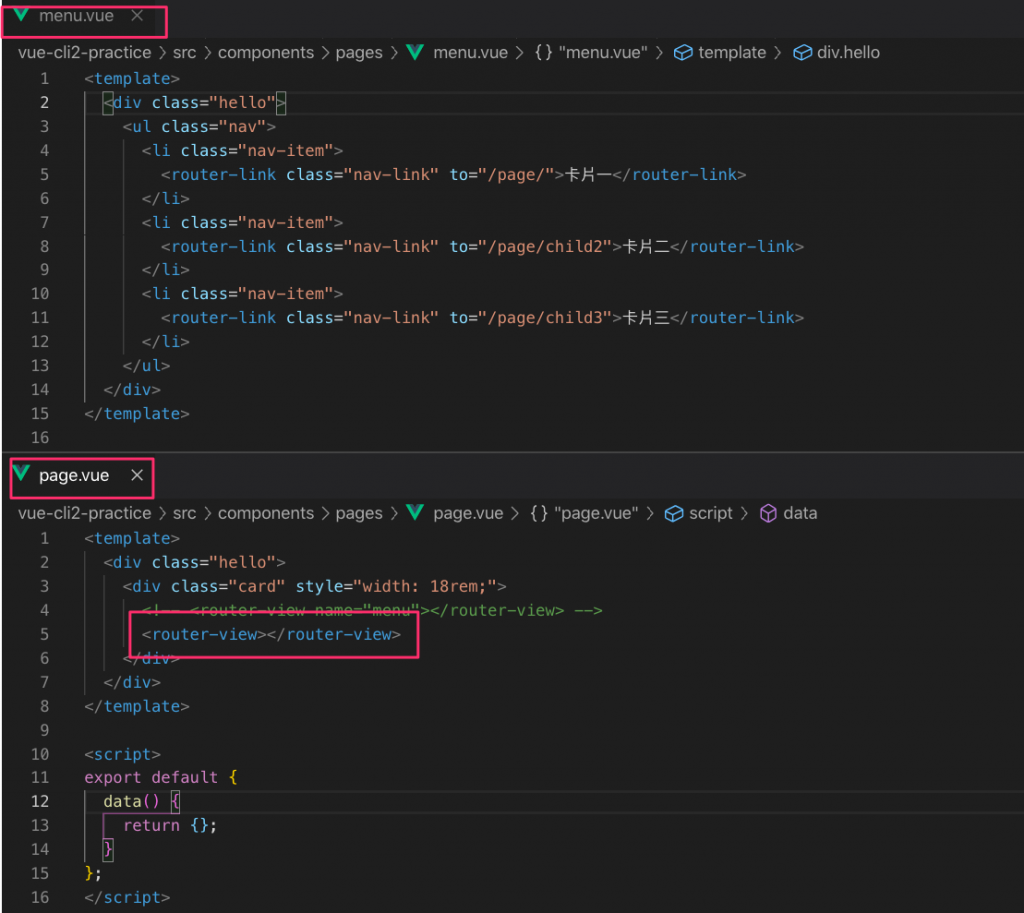
- Menu.vue 和 page.vue
問題詢問
我把檔案做了以下調整
1.上方App.vue檔中,我移除<router-view name=“menu”></router-view>
2.在上方page.vue中新增 <router-view name=“menu”></router-view>
結果畫面只出現child1分頁內容,為何?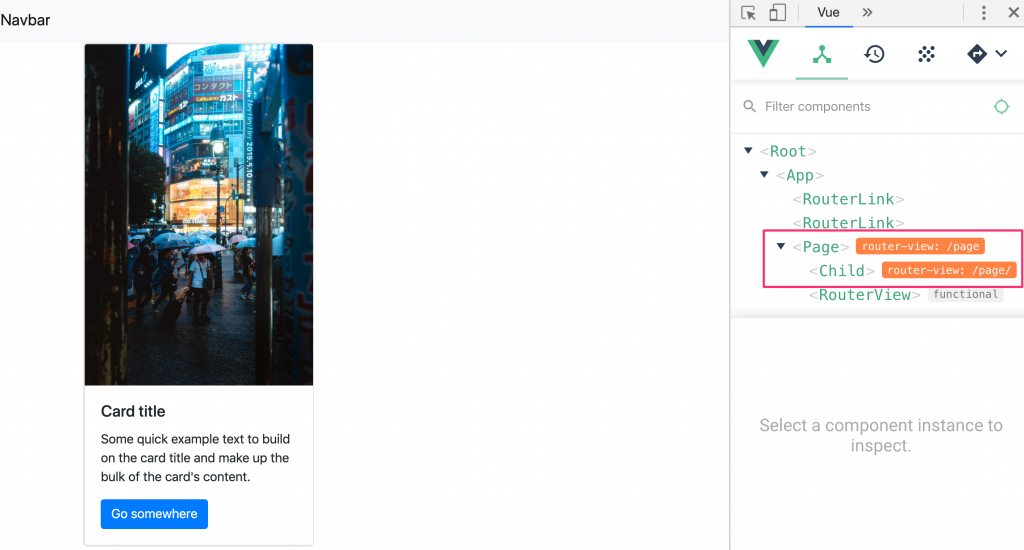
A:因為如果我把<router-view name=“menu”></router-view>放在page.vue中,我們會把menu變成page 的子組件,因此畫面上不會出現。
如果更改為下面範例:
1 | { |
畫面就可以成功出現摟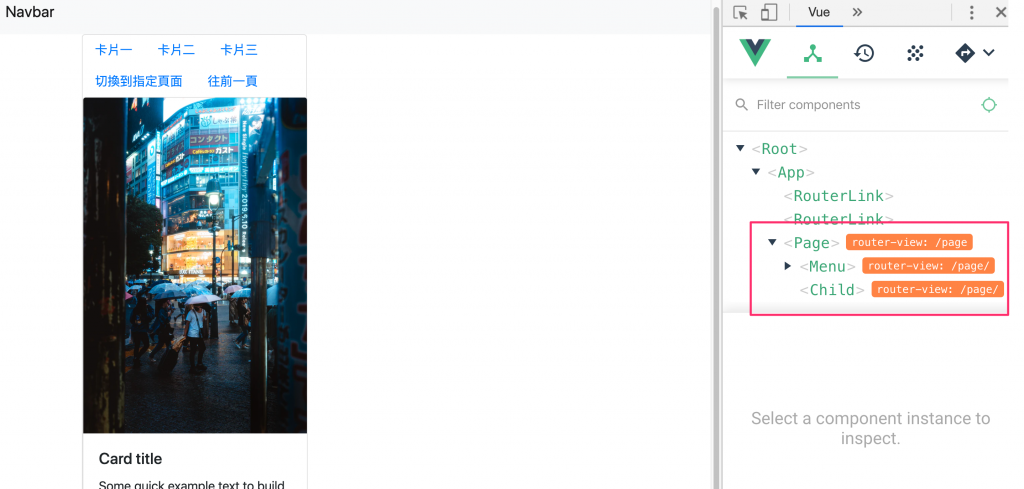
小結論
router-view
白話文:父組件中會包含 router-view作為子組件的渲染出口!
參考文章:跟著 Vue 闖盪前端世界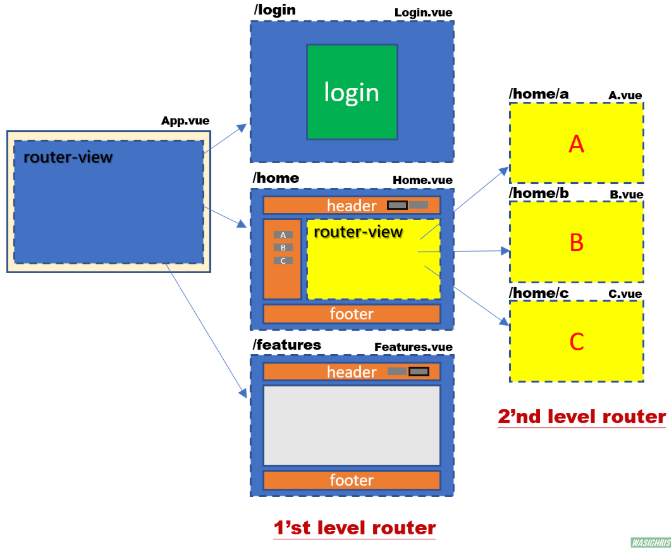
常用Vue Router 參數設定
Router建構選項
- mode
可以將路由中#移除,但建議還是保留預設狀態即可(原因是因為移除後,就必須和後端配合路由切換) - linkActiveClass
可以將標籤className替換1
2
3
4
5
6
7
8
9
10
11
12
13export default new VueRouter({
mode:'history',
// 可以將路由中#移除,但必須提醒若將#移除就不是前端模擬路由。
// 而是後端切換路由,因此後端路徑也必須重新配置
linkActiveClass:'active', //標籤className替換
routes: [
{
path: '/index', //對應的虛擬路徑
name: 'home', //元件呈現的名稱
component: Home, //對應元件
},
]
});切換路徑方法
文件參考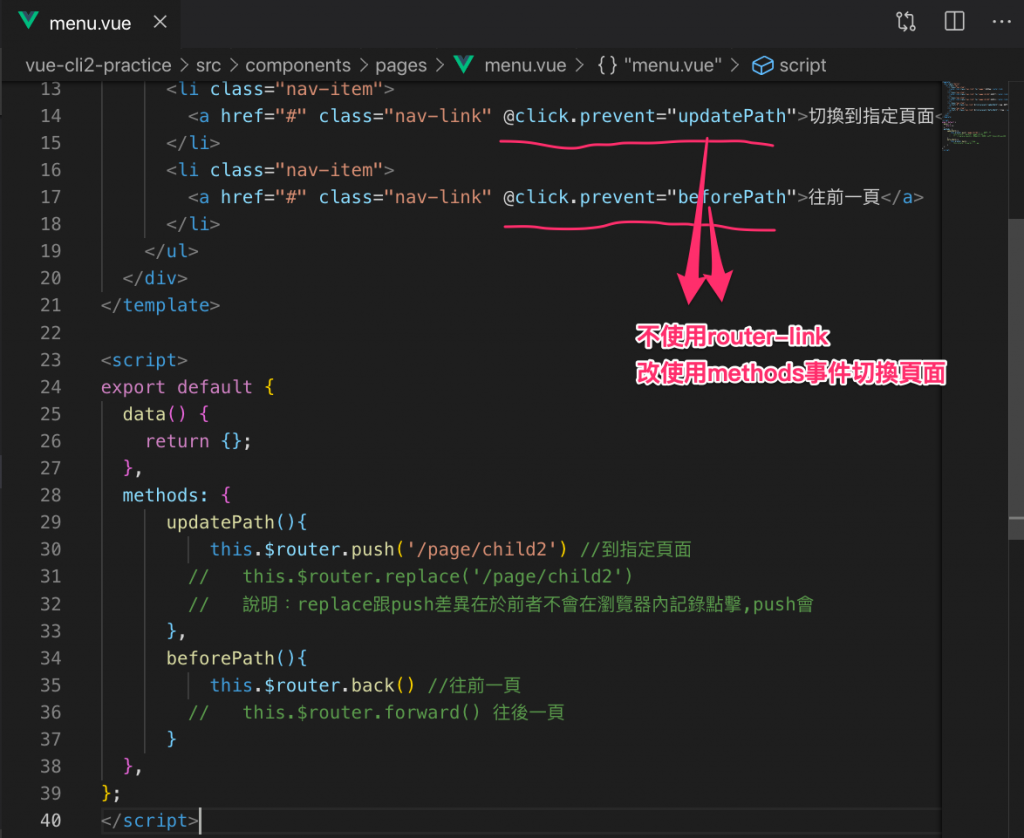
補充說明: - 為何官網上寫
router.push(‘/page/child2’),而我們這邊卻使用this.$router.push(‘/page/child2’)呢?
A:原因在於我們在main.js中,有先執行了 vue.use(….),因此外部資源會被掛載到 vue 內。所以就可以使用 this 來呼叫這些資源 - 比較:
router.push()會向history添加新記錄,當用戶點擊瀏覽器後退按鈕時,則回到之前的URL。router.replace()不會向history添加新記錄